If you are reading this blog post via a 3rd party source it is very likely that many parts of it will not render correctly (usually, the interactive graphs). Please view the post on dogesec.com for the full interactive viewing experience.
tl;dr
I have introduced how to author Sigma Rules in two previous posts on this blog;
- Writing Effective Sigma Detection Rules: A Guide for Novice Detection Engineers
- Writing Advanced Sigma Detection Rules: Using Correlation Rules
The part that’s missing in both of these posts is how to turn a Sigma Rule into a format that’s usable by your SIEM.
As highlighted in the first post, Sigma was built to try and solve this fragmentation problem – one detection language to rule them all.
While native Sigma adoption is still rare among SIEM vendors, some platforms, including Elastic Security and Chronicle Security, have partial native Sigma support. However the reality is; most SIEMs only support their own query language.
Thus, a process to take a Sigma Rule and convert it into SPL (Splunk), KQL (Microsoft), etc. is still needed.
In this post I’ll document exactly how this can be done, from simplistic conversions, to more advanced use-cases.
The conversion flow
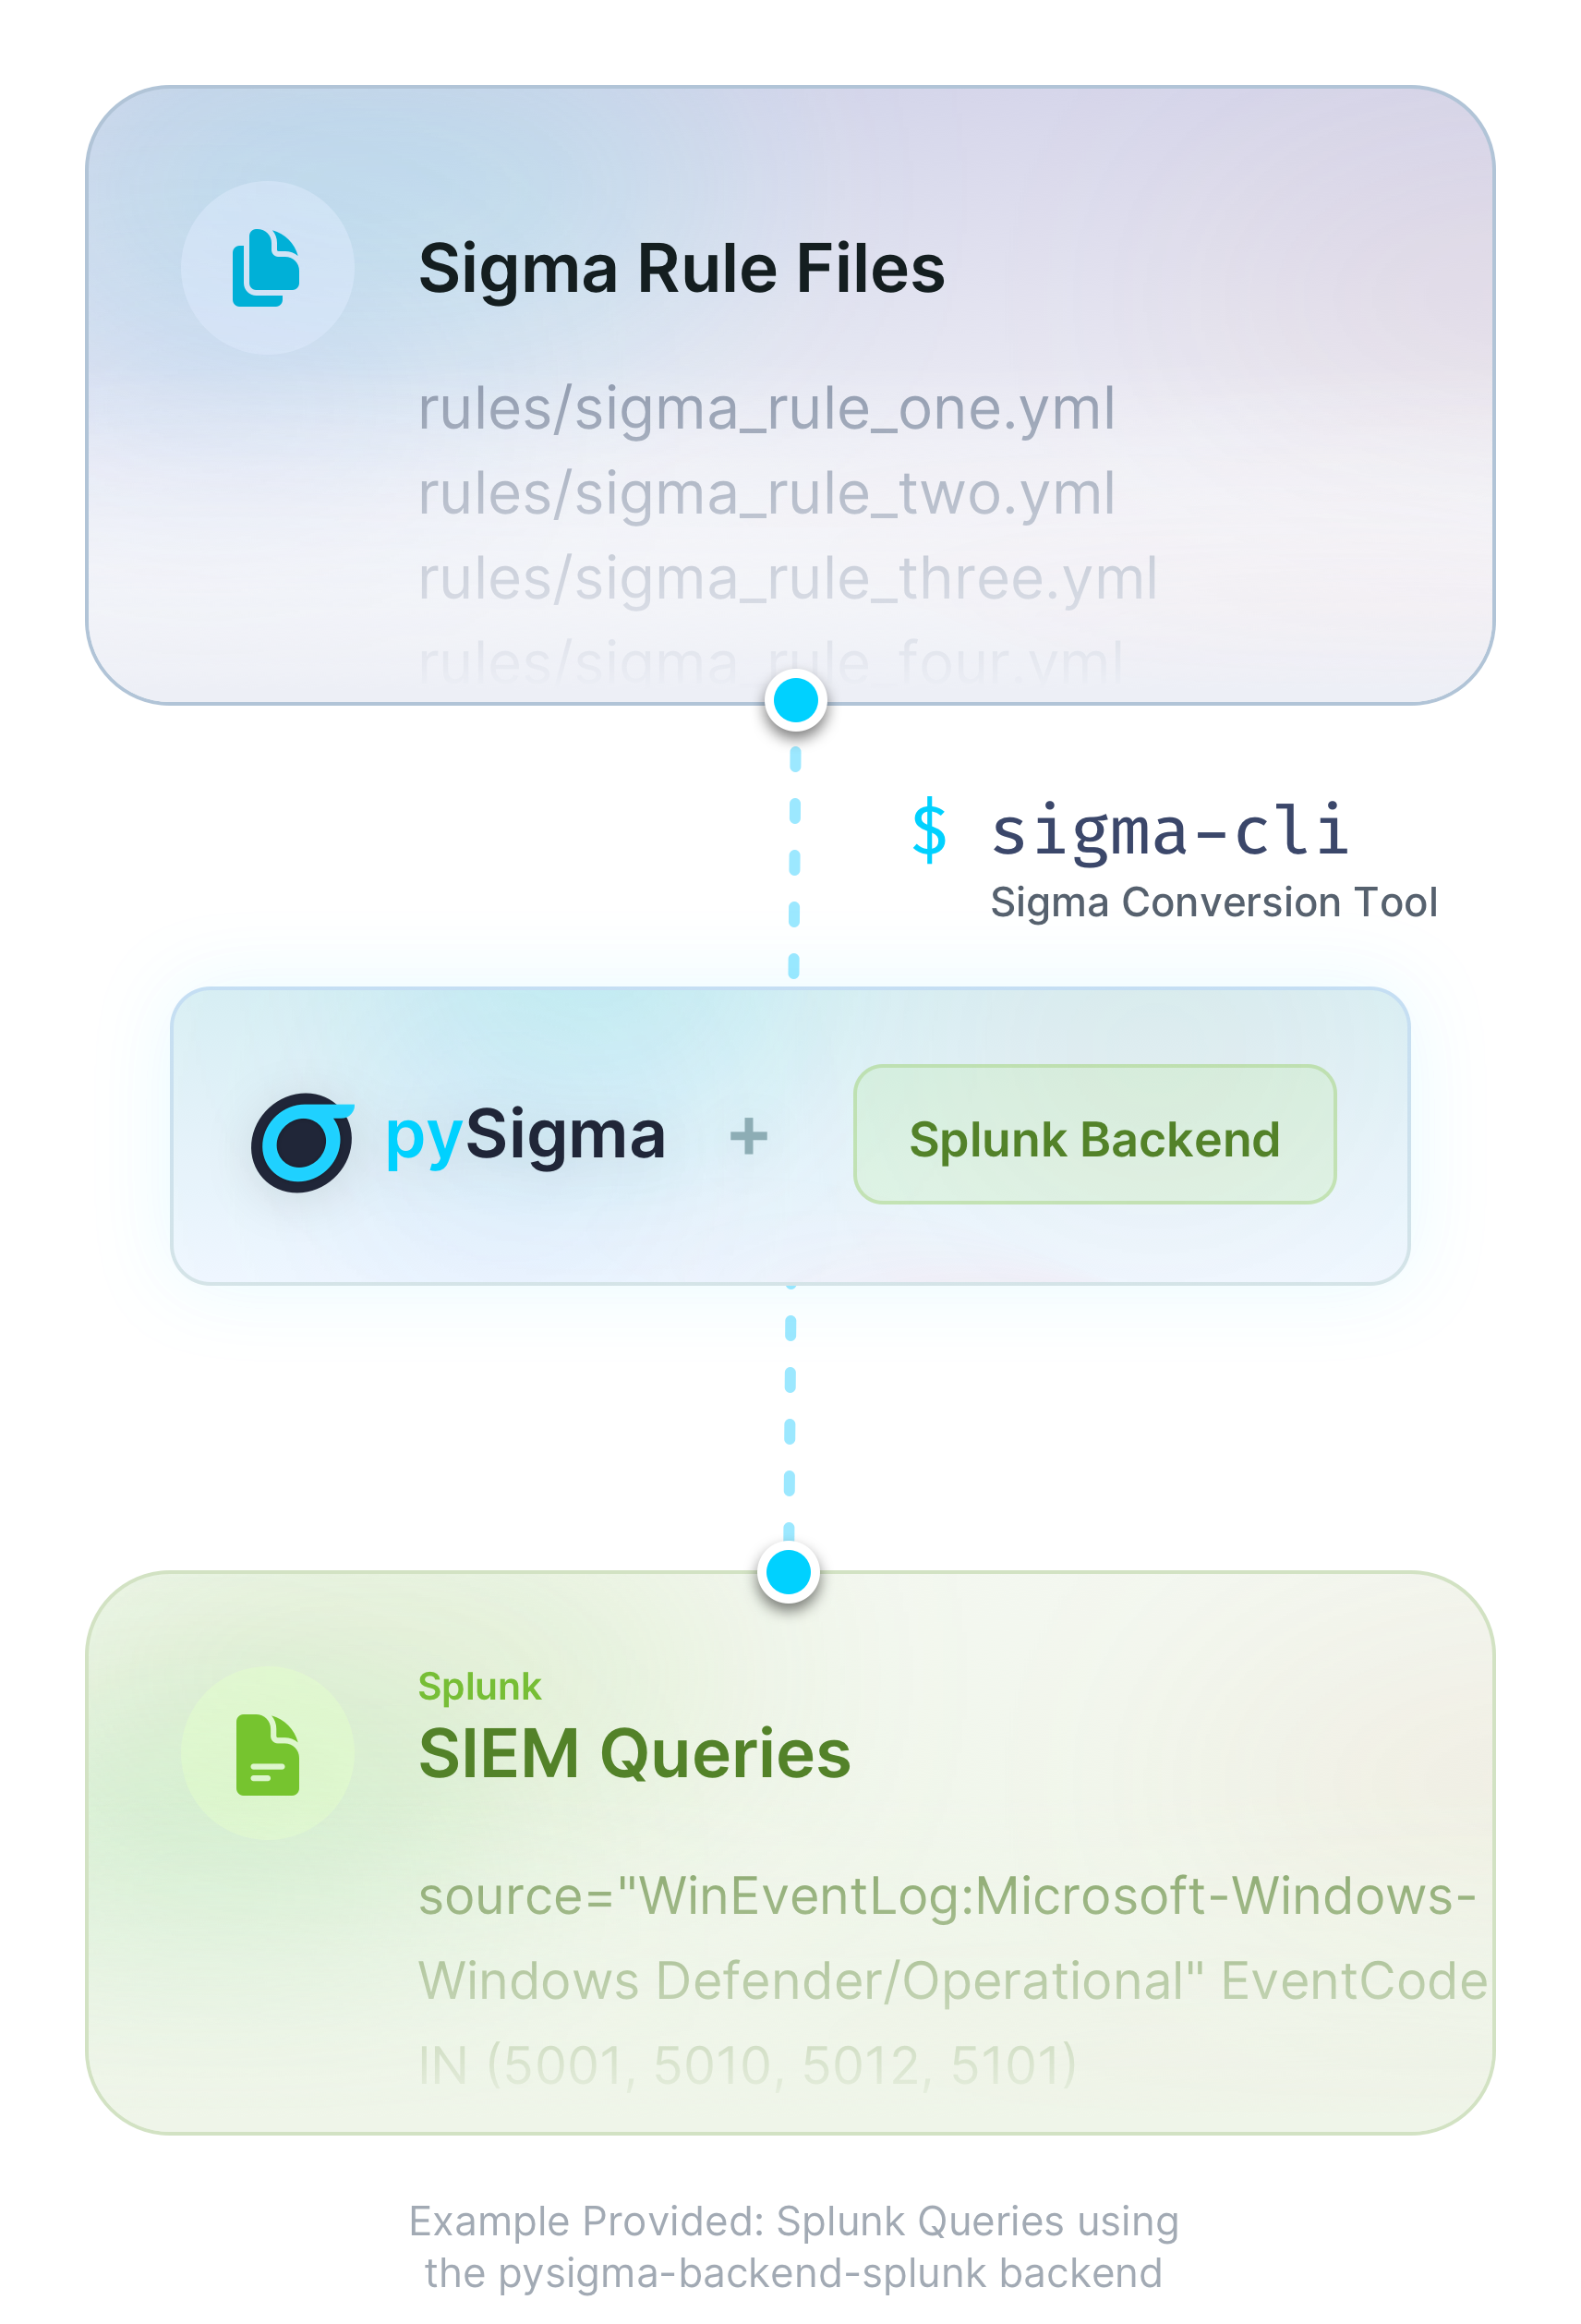
The diagram below is taken from the official Sigma documentation and explains the typical conversion flow of a Sigma Rule to a target format;

Described in words;
- take one or more Sigma rules or Sigma detection rules
- define how you want these rules to be converted in sigma-cli
- sigma-cli uses the pySigma plugin (Splunk in the example above) selected to convert the rule
- a SIEM supported query (e.g. Splunk SPL) is created
Let me start by explaining the difference between pySigma plugins, pySigma and the sigma-cli in a little more detail…
- pySigma is a python library that contains generic logic as to how conversions should work exposed via an API
- pySigma plugins can be installed on-top of pySigma to add the specific conversion logic for the output language desired. For example, the Splunk pySigma plugin
- sigma-cli is a simple to use command line interface that makes it easier to interact with pySigma and pySigma plugins (so you don’t have to learn how to interact with the pySigma API directly)
pySigma plugins
pySigma plugins are where the customisation for rule transformations happens.
The word plugin and backend are often used interchangeably. It’s a little more complex than that.
A plugin can either be of type backend or pipeline.
However, a backend type plugin can ship with pipelines.
A backend plugin can also have more than one backend.
Don’t worry if this is a little confusing at this point-in-time, this will all be cleared up.
pySigma plugins: backends
Sigma backends are the drivers of the Sigma conversion process, and implement the conversion capability that converts each Sigma rule file into a SIEM compatible query.
For example, here’s the backend definition in the Splunk plugin. Examining a short snippet of that file;
    bool_values = {True: "true", False: "false"}
    or_token: ClassVar[str] = "OR"
    and_token: ClassVar[str] = " "
    not_token: ClassVar[str] = "NOT"
    eq_token: ClassVar[str] = "="

    field_quote: ClassVar[str] = '"'
    field_quote_pattern: ClassVar[Pattern] = re.compile(r"^[\w.]+$")

    str_quote: ClassVar[str] = '"'
    escape_char: ClassVar[str] = "\\"
    wildcard_multi: ClassVar[str] = "*"
    wildcard_single: ClassVar[str] = "*"
    add_escaped: ClassVar[str] = "\\"
You can see the definition of how Sigma functions map to the equivalent Splunk functions.
e.g or_token (aka or conditions) are handled in Splunk queries using the string OR.
Essentially this tells the convertor, when an or condition exists in a Sigma Rule (e.g in a list), it should be written into a Splunk Rule with the string OR.
So why would you have more than one backend in a plugin?
In short, because there is not always one query language in product, or that query language is extended in extended parts of the product.
Take the Elasticsearch plugin for example, which contains the backends;
elasticsearch_elastalert.pyelasticsearch_eql.pyelasticsearch_esql.pyelasticsearch_lucene.py
These are designed to cover different uses of Elastic. For example, elasticsearch_eql.py is designed to cover the Elasticsearch event query language backend, whereas elasticsearch_elastalert.py is designed to work with the ElastAlert framework, which already has good support for Sigma out-of-the-box, thus, less transformation of the source rule is needed.
The Sigma team themselves maintain many core pySigma backends for common products, including Splunk and Elastic.
Though pySigma is designed in a way that anyone can build a backend to be installed an run in pySigma. Take this one for NetWitness built by Marcel Kwaschny.
Anyway enough theory, lets look at plugins in action…
Installing sigma-cli
sigma-cli gives us pySigma for free (and the ability to install pySigma plugins), so lets use it to explore plugins and conversion in more detail.
Follow along by installing sigma-cli locally;
mkdir sigma_tutorial && \
cd sigma_tutorial && \
python3 -m venv sigma_tutorial && \
source sigma_tutorial/bin/activate && \
pip3 install sigma-cli
To check pySigma is properly installed;
sigma -h
Usage: sigma [OPTIONS] COMMAND [ARGS]...

Options:
  -h, --help  Show this message and exit.

Commands:
  analyze        Analyze Sigma rule sets
  check          Check Sigma rules for validity and best practices (not...
  check-pysigma  Check if the installed version of pysigma is compatible...
  convert        Convert Sigma rules into queries.
  list           List available targets or processing pipelines.
  plugin         pySigma plugin management (backends, processing...
  version        Print version of Sigma CLI.
Exploring pySigma plugins in the sigma-cli
To investigate available pySigma Backends that you can use, run the following commands to view all default backend type plugins in a table;
sigma plugin list -t backend
+----------------+---------+---------+--------------------------------------------------------------+-------------+--------------+
| Identifier     | Type    | State   | Description                                                  | Compatible? | Capabilities |
+----------------+---------+---------+--------------------------------------------------------------+-------------+--------------+
| ibm-qradar-aql | backend | stable  | IBM QRadar backend for conversion into AQL queries. Contains mappings for fields and logsources  | no          | 0            |
| cortexxdr      | backend | stable  | Cortex XDR backend that generates XQL queries.               | yes         | 0            |
| carbonblack    | backend | stable  | Carbon Black backend that supports queries for both          | yes         | 0            |
| sentinelone    | backend | stable  | SentinelOne backend that generates Deep Visibility queries.  | yes         | 0            |
| sentinelone-pq | backend | stable  | SentinelOne backend that generates PowerQuery queries.       | yes         | 0            |
| splunk         | backend | stable  | Splunk backend for conversion into SPL and tstats data model queries as plain queries and savedsearches.conf | yes         | 3            |
| insightidr     | backend | stable  | Rapid7 InsightIDR backend that generates LEQL queries.       | no          | 0            |
| qradar         | backend | stable  | IBM QRadar backend for conversion into AQL and extension packages.    | no          | 0            |
| elasticsearch  | backend | stable  | Elasticsearch backend converting into Lucene, ES|QL (with correlations) and EQL queries, plain, embedded into DSL or as Kibana NDJSON.  | yes         | 3            |
...
Note, I’ve removed part of this table for brevity in this posts (many more backend plugins are available by default).
Here is a brief overview of each column;
- Identifier: The unique name of the plugin, which typically corresponds to a specific backend (e.g.,
splunk,elasticsearch,carbonblack) (or a processing pipeline (e.g.,windows,sysmon)). - Type – Specifies whether the plugin is a backend (for converting Sigma rules into queries for a specific system) or a pipeline (for transforming or normalizing data fields before conversion).
- Note: the CLI command run filters results to only include backends.
sigma plugin list -t pipelinewill show you pipelines – I will cover these later on
- Note: the CLI command run filters results to only include backends.
- State – Indicates the maturity level of the plugin:
stable– Well-tested and production-ready.devel– Still in development; might have bugs or be incomplete.testing– Under testing; not fully validated for production use.
- Description – A brief explanation of what the plugin does, including which SIEM/logging system it supports and how it processes Sigma rules.
- Compatible? – Indicates whether the plugin is compatible with your current setup (
yesorno). Anohere could mean missing dependencies, an unsupported platform, or other compatibility issues. - Capabilities – A numerical value that represents the level of support the plugin provides. This could indicate the number of supported features, query optimizations, or supported data mappings.
Lets use the Splunk backend plugin, one of the most developed, to demonstrate a conversion.
First, you need to install the plugin using its identifier;
sigma plugin install splunk
Successfully installed plugin 'splunk'
pySigma version is compatible with sigma-cli
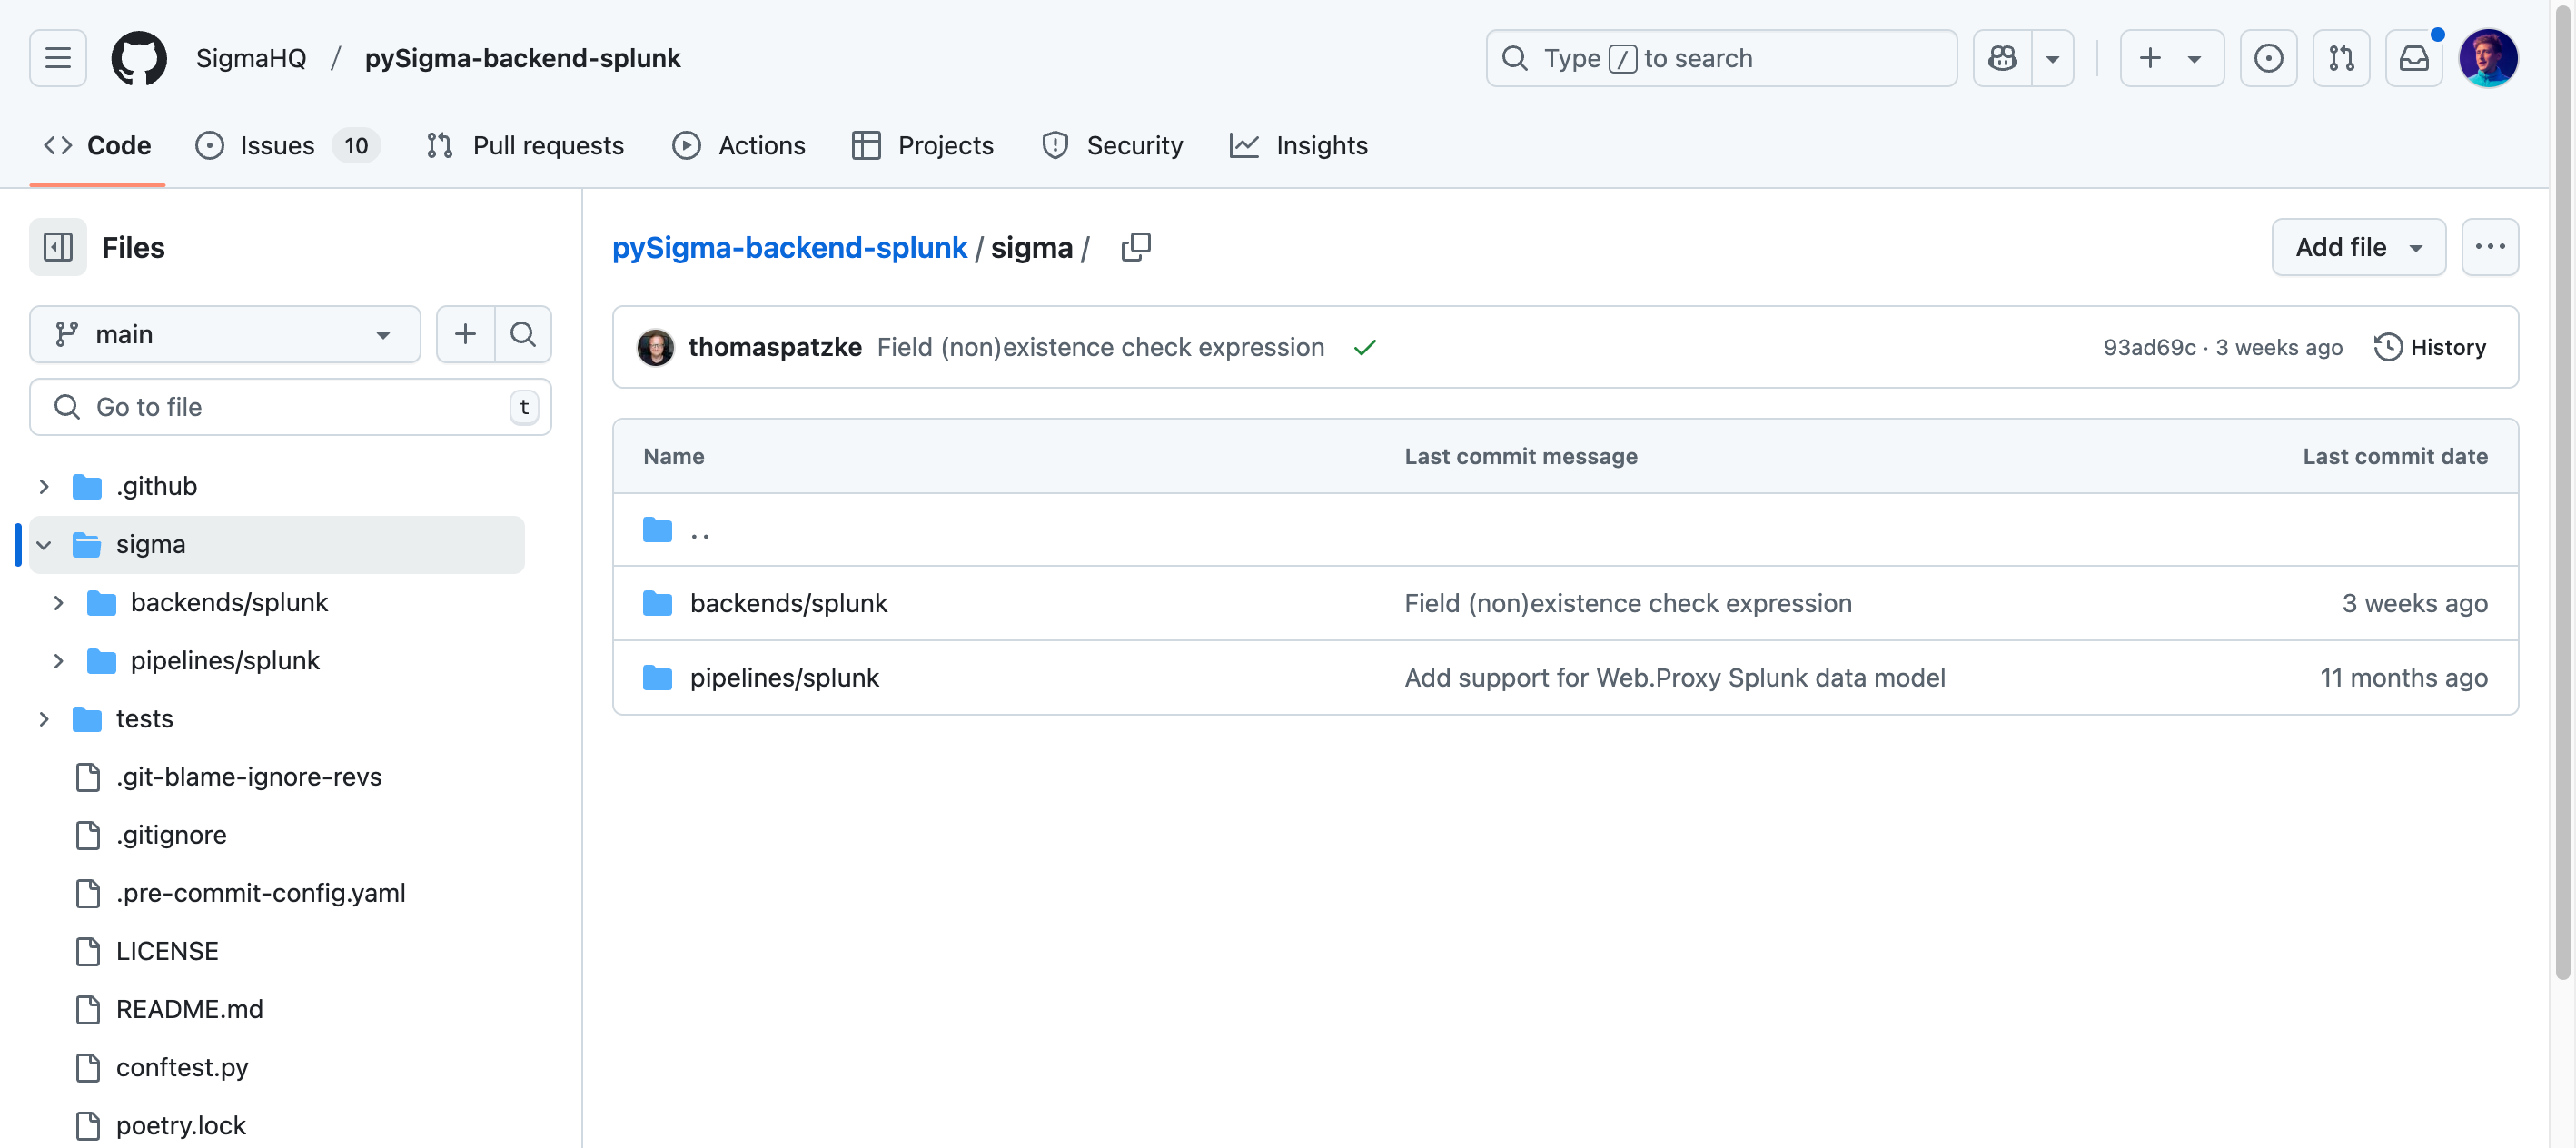
If you’re interested, you can see the actual backend logic in the Splunk backend here.
The eagle eyed amongst you will have noticed the pySigma Splunk backend plugin also contains pipelines.

In fact, some plugins, including Splunk, require a backend to be selected at conversion because the generic backend logic need tuning for different cases;
    requires_pipeline: ClassVar[bool] = (
        True  # Does the backend requires that a processing pipeline is provided?
    )
A short deviation into pipelines
Processing pipelines provide granular control over how Sigma rules are converted into SIEM-specific formats.
Common use cases include:
- Mapping Sigma field names to SIEM-specific field names
- Transforming generic log sources into platform-specific ones
- Adding conditions or modifying rule structure for specific environments
To find out the pipelines installed in pySigma that work with the Splunk backend you can run;
sigma list pipelines splunk
+----------------------------+----------+----------------------------------------------------+----------+
| Identifier                 | Priority | Processing Pipeline                                | Backends |
+----------------------------+----------+----------------------------------------------------+----------+
| splunk_windows             | 20       | Splunk Windows log source conditions               | splunk   |
| splunk_sysmon_acceleration | 25       | Splunk Windows Sysmon search acceleration keywords | splunk   |
| splunk_cim                 | 20       | Splunk CIM Data Model Mapping                      | splunk   |
+----------------------------+----------+----------------------------------------------------+----------+
These three pipelines are called here;
from .splunk import (
    splunk_windows_pipeline,
    splunk_windows_sysmon_acceleration_keywords,
    splunk_cim_data_model,
)

pipelines = {
    "splunk_windows": splunk_windows_pipeline,
    "splunk_sysmon_acceleration": splunk_windows_sysmon_acceleration_keywords,
    "splunk_cim": splunk_cim_data_model,
}
And then each is defined in this pipeline file.
The splunk_cim pipeline shown above is essentially pipeline to rename fields correctly to support Splunk’s Common Information Model.
In the Splunk pipeline file you can see splunk_sysmon_process_creation_cim_mapping, splunk_windows_registry_cim_mapping, etc defining the field name transformations for the splunk_cim pipeline.
Lets look at one of them, splunk_sysmon_process_creation_cim_mapping;
splunk_sysmon_process_creation_cim_mapping = {
    "CommandLine": "Processes.process",
    "Computer": "Processes.dest",
    "CurrentDirectory": "Processes.process_current_directory",
    "Image": "Processes.process_path",
    "IntegrityLevel": "Processes.process_integrity_level",
    "OriginalFileName": "Processes.original_file_name",
    "ParentCommandLine": "Processes.parent_process",
    "ParentImage": "Processes.parent_process_path",
    "ParentProcessGuid": "Processes.parent_process_guid",
    "ParentProcessId": "Processes.parent_process_id",
    "ProcessGuid": "Processes.process_guid",
    "ProcessId": "Processes.process_id",
    "User": "Processes.user",
}
Here, this part of the pipeline is turning the field name in the Sigma Rule into the CIM compliant fields for Sysmon process creation type events (e.g. CommandLine defined in the Sigma Rule should be turned into Processes.process in the Splunk query).
To really illustrate this, I’ll show you an example conversion using two different Splunk pipelines.
Firstly, lets create a very simple rule to begin with called demo_rule_1_for_splunk_pipelines.yml stored in a directory rules;
title: Demo rule for Splunk pipelines
name: demo_rule_1_for_splunk_pipelines
status: unsupported
logsource:
    product: windows
    category: process_creation
detection:
    selection1:
        - Image|endswith: '\wbem\WMIC.exe'
        - CommandLine|contains: 'wmic '
    selection2:
        ParentImage|endswith:
            - '\winword.exe'
            - '\excel.exe'
            - '\powerpnt.exe'
            - '\msaccess.exe'
            - '\mspub.exe'
            - '\eqnedt32.exe'
            - '\visio.exe'
    condition: all of selection*
Using the convert command in sigma-cli;
sigma convert \
    -t splunk \
    -p splunk_windows \
    rules/demo_rule_1_for_splunk_pipelines.yml > rules/demo_rule_1_for_splunk_pipelines_splunk_windows.spl
Breaking this down;
convert: the sigma-cli function I want to run-t: the target plugin-p: the pipelinerules/demo_rule_1_for_splunk_pipelines.yml: the input rulerules/demo_rule_1_for_splunk_pipelines_splunk_windows.spl: where to save the output rule
Gives;
Image="*\\wbem\\WMIC.exe" OR CommandLine="*wmic *" ParentImage IN ("*\\winword.exe", "*\\excel.exe", "*\\powerpnt.exe", "*\\msaccess.exe", "*\\mspub.exe", "*\\eqnedt32.exe", "*\\visio.exe")
The field names are not renamed here, because this logic is not included in the splunk_windows pipeline.
Now, I will use the splunk_cim pipeline where CommandLine, ParentImage, and Image properties are renamed in the logic.
sigma convert \
    -t splunk \
    -p splunk_cim \
    rules/demo_rule_1_for_splunk_pipelines.yml > rules/demo_rule_1_for_splunk_pipelines_splunk_cim.spl
Produces the rule;
Processes.process_path="*\\wbem\\WMIC.exe" OR Processes.process="*wmic *" Processes.parent_process_path IN ("*\\winword.exe", "*\\excel.exe", "*\\powerpnt.exe", "*\\msaccess.exe", "*\\mspub.exe", "*\\eqnedt32.exe", "*\\visio.exe")
See how the pipeline has renamed the fields.
Creating your own pipelines
Pipelines can also live alongside your rule catalog where a plugin does not meet your need. Even better, they don’t need to be created using Python.
Here’s an example pipeline that demonstrates how to create a custom pipeline using a .yml pipeline definition (I use the same field conversions as found in the splunk_cim for the fields in my demo rule);
mkdir pipelines
vim pipelines/my_custom_pipeline.yml
name: Renaming fields
priority: 30
transformations:
  - id: windows_mapping
    type: field_name_mapping
    mapping:
      Image: Processes.process_path
      CommandLine: Processes.process
      ParentImage: Processes.parent_process_path
Essentially I am creating a mapping type transformation for the defined fields.
I can run this pipeline with the Splunk backend plugin as follows;
sigma convert \
    -t splunk \
    -p pipelines/my_custom_pipeline.yml \
    rules/demo_rule_1_for_splunk_pipelines.yml > rules/demo_rule_1_for_splunk_pipelines_splunk_my_custom_pipeline.spl
Which produces the rule;
Processes.process_path="*\\wbem\\WMIC.exe" OR Processes.process="*wmic *" Processes.parent_process_path IN ("*\\winword.exe", "*\\excel.exe", "*\\powerpnt.exe", "*\\msaccess.exe", "*\\mspub.exe", "*\\eqnedt32.exe", "*\\visio.exe")
You might be wondering why the priority property is 30.
Above it is arbitrary because only one pipeline is used, however priority is indeed very important when chaining together pipelines.
When multiple pipelines are specified, they are executed in the order from the lowest priority to the highest.
I’ll demonstrate by chaining pipelines;
vim pipelines/my_custom_pipeline_30a.yml
name: Renaming fields 1
priority: 30
transformations:
  - id: windows_mapping
    type: field_name_mapping
    mapping:
      Image: Processes.process_path
      CommandLine: Processes.process
      ParentImage: Processes.parent_process_path
vim pipelines/my_custom_pipeline_50a.yml
name: Renaming fields 2
priority: 50
transformations:
  - id: windows_mapping
    type: field_name_mapping
    mapping:
      Processes.process_path: this
      Processes.process: is
      Processes.parent_process_path: wrong
Running these pipelines over my rule.
sigma convert \
    -t splunk \
    -p pipelines/my_custom_pipeline_30.yml \
    -p pipelines/my_custom_pipeline_50.yml \
    rules/demo_rule_1_for_splunk_pipelines.yml > rules/demo_rule_1_for_splunk_pipelines_splunk_my_custom_pipeline_30_50.spl
this="*\\wbem\\WMIC.exe" OR is="*wmic *" wrong IN ("*\\winword.exe", "*\\excel.exe", "*\\powerpnt.exe", "*\\msaccess.exe", "*\\mspub.exe", "*\\eqnedt32.exe", "*\\visio.exe")
Here the rule is first transformed using Renaming fields 1 (lowest priority) but then the field names are transformed again in Renaming fields 2 (highest priority) to produce the output above.
As noted, pipelines can do a lot more than just field mappings but I won’t cover that in this post.
Converting Sigma correlations
The good news is, many backends can also work with Sigma Correlation rules.
Lets take the rule rules/windows_failed_login_single_user.yml
title: Windows Failed Logon Event
name: failed_logon # Rule Reference
description: Detects failed logon events on Windows systems.
logsource:
    product: windows
    service: security
detection:
    selection:
        EventID: 4625
    condition: selection
---
title: Multiple failed logons for a single user (possible brute force attack)
correlation:
    type: event_count
    rules:
        - failed_logon # Referenced here
    group-by:
        - TargetUserName
        - TargetDomainName
    timespan: 5m
    condition:
        gte: 10
sigma convert \
    -t splunk \
    -p splunk_windows \
    rules/windows_failed_login_single_user.yml > rules/windows_failed_login_single_user.spl
Which when run produces the rule;
source="WinEventLog:Security" EventCode=4625
| bin _time span=5m
| stats count as event_count by _time TargetUserName TargetDomainName
| search event_count >= 10
You can see the grouping, time-span, and condition of the Sigma Correlation rule are all observed in the output.
In summary
The pySigma plugin library probably already supports the types of tools you use through backends.
However, it’s likely you’ll need to tune how rules are converted using pipelines like those described in this post.
SIEM Rules
Your detection engineering AI assistant. Turn cyber threat intelligence research into highly-tuned detection rules.

Discuss this post
Head on over to the dogesec community to discuss this post.

Never miss an update
Sign up to receive new articles in your inbox as they published.
